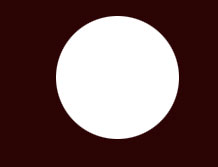
1) Make a circular selection on a Layer, fill with white. This is going to be the base of our eyeball, so consider your space well. Lock the transparency of the layer so that we can goof off with the shadings and not colour outside the lines
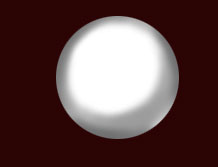
2) Let's pick a medium grey, and begin shading for a sphere. I decided on a top - left light source, so the shading is weighted away from that direction. Once the medium grey is brushed in place (soft brushes used here, and a medium opacity, around 50) pick a darker grey, and brush along the edge of the sphere to give more depth.
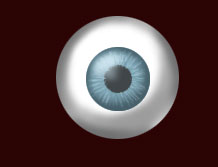
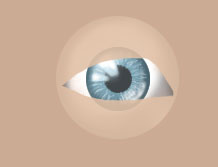
3) All righty, two more circular selections now. First for the Iris. Make the selection, and then colour in with whatever shade you want as a base. Try not to get too saturated, or the eye will look as if it glows, and it gets eerily unreal. I chose a low sat blue. Second selection is for the pupil. Look at the proportions, study photos...you'll get it after a while, and start understanding the reactions to light etc.
4) Pick a lighter shade than the base tone of the iris, and begin drawing tiny lines away from the center of the pupil, toward the edge of the iris. Don't cover over the pupil with the lines, but feel free to brush a bit inside it. It helps the realism to see the raidn lines interacting with the pupil. Use a hard brush, maybe a couple or 3 pixels diameter.
Pick a darker shade than the base tone, and brush around the edge of the iris (make a circular selection around the iris to mask the rest of the eye). Soft brush this time so that it blends with the other tones.
At this point I used white and a low opacity brush to start a highlight on the iris in the top left, reflecting the angle of the light. This is the first step to making the light interaction seem moderately real on the eye.
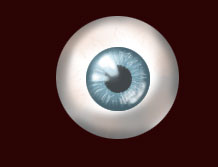
5) Now, one pixel hard brush using white. Paint in more squiggling radians overtop of the light blue ones already made. The fluctuations in tones and sharpness will give that "randomness" I'm always babbling about. Remember to keep them radiating out from the center of the pupil to the edge of the iris.
Using white still, soft brush low opacity, brush in higher highlights. I like the look of a split reflection of intense light, so I used it again here. Now choose a hard brush, higher opacity, and brush in the shape of the highlight itself. Add in a refracted light in the bottom right, not nearly as intense as the reflected light, and we're cooking with gas.
6) Time for tone and veins. I go with a slight red hue on a low opacity soft brush. I use this to give the eyeball a more natural "blood" hue. Brush over the shaded areas blending the tone with the shade. I then took a small hard brush, and brushed in low opacity veins. Radiating from the outside toward the center, splitting, squiggly lines not too long or intense.
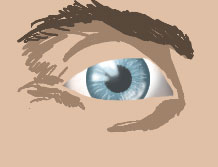
7) Our second Layer now comes into play. Paint in a skin tone leaving the "eye opening" clear, or fill the whole layer, and then erase where the eye opening will be. I dropped the opacity of the skin layer hear so I could see the eye underneath and start roughing out the basic lines of the eyelid, eyebrow etc. It also helped while I was refining the eye opening.
8) Well there are thos basic lines I was talking about. I chose a deeper tone of the flesh colour to brush in the line layouts for the skin. Not going too dark will help when I'm blending. I roughed in the eyebrow shape as well. Even though it won't be black in the end it helps to keep it dark to trick your eye into looking away from it while painting. The eyebrow is last for me. Detailing.
9) Softer brush, lower opacity, a tone midway between the base skin tone, and the line layout tone. I bursh in the curves of the skin contours. I make sure that I start looking at all the curves including the lips of skin above and below the eye. Keep your light source direction in mind through all of this to help you actualize the shades and highlights.
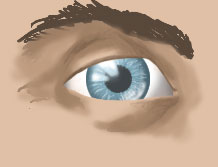
10) Speaking of highlights: Choose a lighter tone than the base skintone. Brush in (soft brush again) the areas where light will fall more intensely. We're still roughing it here, so no need for precision strokes yet.
11) Time to bring in some colour. Human skin is never flat...nor is it flat toned. I chose a red here to bring into the mix. The tones of the shadows etc. will always be determined by the colour of the light source mioxed with the shade of the flesh. I cheated here and stuck to white light, so the skin tone will be more peach/reddish. Brush in some shadows and spread out the colour variations.
I used a textured brush here. A standard PS spatter brush, with an increased spacing (around 15 or 20 %). This helps give the skin a bit of texture, and spread out the blending without using the dreaded over-soft brushes, or (shudder) smudge tool to do all your blends.
12) More colour. I used a lighter yellow-ish tone here to blend the highlights of the skin. The mixing colours will keep the variations well, and cause a bit more realistic recognition. Again, using hard spatter brushes for blends.
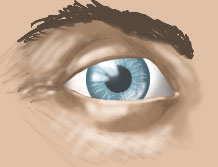
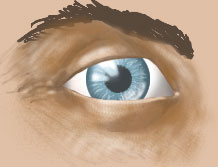
13) Well now we have shaded skin....and a GLARING WHITE EYEBALL!!! No good. Let's jump back to the eyeball Layer, and start adjusting some shadows to fit with the eye itself.
Since the light is from the top left, the shadows will fall to the bottom right. Let's make sure there's a nice shading right under the top lid to show the angle, and impression. After that shading toward the edges of the opening and spherical shading will help give depth and conncetion to the eye in the socket. I used red tones to blend with the skin, but then a deeper brown-grey to do the darker shades, keeping the eye from blurring and blending in too much. Again, hard spatter brush...it's very useful at times (other custom brushes will be more so, but for now stock brushes work).
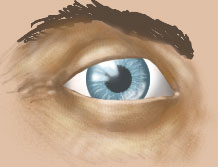
14) Let's refine the highlights and shadows a bit. Touch up the tones and the blends with texture and soft brushes. Now, pick a hard brush, and a light cream tone. One pixel brush, and start brushing hairs into the eyebrows. This is the only step where the smudge tool does help. I used it to drag hairs out, and blend skin back into the eybrows. They're cheesy, but hey they work for now.
Make sure the hairs aren't too concentrated, and they don't go wild and overdone. Just enough to suggest hair is perfect..the rest people will imagine anyway.
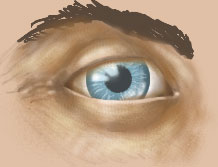
I also added a bit more red hue at this point, just to shape a bit better with the colour. Low opacity soft brush this time just to have smooth blends.
And that's that for now.
Anyone that wants the two layer PSD (heh) can grab it HERE.
----------------------------------------------
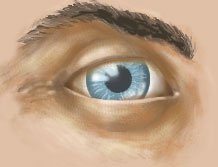
The reason I've used texture brushes etc. in this is so that we stay away from that ugly "PS Airbrush" look that seems overly-smooth, blurry, and flat.
Realism has variance to it, and that randomness. Keep that in mind, and don't try to polish the little flaws, and you're good to go with this..for a start.
Now, hit it. Teach me something as well. I really hope it helps.